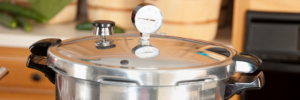
Everything you want to know about Pressure Canning

First Time Pressure Canning (Water Only)
My first time pressure canning was a lot like getting ready for a rocket launch. The jars were all lined up nicely, filled with just water, but I was taking it super seriously. I twisted on the lids, checked everything three times, and paid close attention to every little click of the pan.
As the pressure started to rise, I plopped down on a stool beside it, almost like the bread needed a buddy. The hissing was both a little scary and pretty cool. But after some time… nothing happened. No big bang, no excitement. Just a calm, bubbling assurance.
When everything had cooled down and I pulled out the jars, I felt a surprising sense of pride. Clear jars filled with water, all perfectly sealed. Maybe they were useless, but to me, they were proof: I had taken a chance, and it had paid off.
Why should you begin with water?
Many folks who are eager to learn about pressure canning often begin with just water. It may seem a bit odd, but it’s actually the safest way to:
- getting familiar with your pressure canner
- to discover how to create and manage pressure
- to learn how to seal jars safely without losing any food
- build confidence before using real ingredients
You go through the whole process, making sure everything stays safe with the food.
Supplies
For your first time trying pressure canning, you’ll need these things:
- A pressure canner (not a pressure cooker)
- Glass jars for preserving or canning that are perfect for pressure canning.
- Fresh lids and twist-off rings
- A set of tongs
- A stand for the canner
- Fresh water
- A fresh cloth

Step-by-step: pressure canning with water
1. Check your material
- Check that the pressure canner is clean and undamaged.
- Check if the valve opening is clear
- Place the rack on the bottom of the canner
2. Prepare pots
- Wash the pots with warm water and dish soap
- Rinse well
- Keep them warm (for example in hot water) so they are not shocked by temperature changes
3. Filling pots
- Fill each pot with clean water
- Leave about 2–3 cm headspace (space to the edge)
- Wipe the edge clean with a cloth
- Replace the lid and tighten the ring until finger-tight (not tight).
4. Fill the canner
- Add the amount of water your canner prescribes (usually 5–8 cm, no immersion)
- Place the filled jars on the rack
- Close the lid according to the manufacturer’s instructions
5. Venting
- Turn on the heat and let the canner vent open
- Once a constant stream of steam comes out, let it steam for 10 minutes
- This removes air from the canner and is essential for proper pressure
6. Build up pressure
- Place the weight or close the valve
- Pressurize the canner to the correct pressure (usually 10 or 15 PSI, depending on type and height)
- Start the timer once the correct pressure is reached
- For water, 10 minutes is often recommended — this is purely practical.
7. Hold pressure
- Keep the pressure constant throughout
- If the pressure gets too low, you have to restart the timer.
8. Let it cool naturally
- Turn off the heat afterward
- Let the canner cool completely on its own
- Never force this process
9. Removing pots
- Open the lid away from you, not towards you
- Carefully remove the jars from the canner
- Place them on a cloth and leave them undisturbed for 12–24 hours
10. Check the seals
- Remove the rings
- Check that the lids are properly secured
- A properly sealed jar does not make a clicking sound
What have you learned now?
After this first practice round you will know:
- how your canner sounds and reacts
- how quickly he builds up pressure
- how precisely you need to control the fire
- What a good seal looks like
And perhaps even more importantly, you know it’s not scary.
Ready for the next step
After water, you can continue with safe starter products such as:
- bouillon
- potatoes
- roots
- beans
But that first time? It starts with just water—and a lot of healthy excitement.
This video will show you how a first time canning can go.